From Hype to API: A Developer’s Guide to Running State-of-the-Art AI on Replicate
The artificial intelligence landscape is evolving at a breathtaking pace. Every week brings a flurry of announcements and fresh PyTorch News or TensorFlow News, with research labs and tech giants like Google DeepMind, Meta AI, and Mistral AI releasing increasingly powerful and efficient models. For developers and businesses, the challenge is no longer a lack of powerful AI, but the operational complexity of deploying, scaling, and managing these models. Setting up GPU environments, handling dependencies, and ensuring uptime can quickly become a full-time infrastructure job, pulling focus away from building innovative applications. This is the problem that Replicate aims to solve.
Replicate has emerged as a crucial platform in the MLOps ecosystem, providing a simple, elegant solution: run any open-source machine learning model with a simple API call. It abstracts away the complexities of Docker, NVIDIA drivers, and CUDA, allowing developers to integrate state-of-the-art models for image generation, language processing, audio synthesis, and more into their applications in minutes, not weeks. This article serves as a comprehensive technical guide for developers looking to leverage Replicate, covering everything from basic API calls and asynchronous workflows to deploying your own custom models and optimizing for production.
Section 1: Core Concepts and Your First Prediction
At its heart, Replicate is a cloud platform that runs machine learning models inside sandboxed Docker containers. The magic lies in its open-source tool, Cog. Cog is a command-line tool that packages a model, its dependencies, and the necessary code into a standardized, portable container image. When you push a Cog-packaged model to Replicate, the platform automatically builds the container, provisions the right GPU hardware (like NVIDIA’s latest), and exposes it via a REST API. This “model-as-an-API” philosophy is what makes it so powerful.
The Replicate Workflow
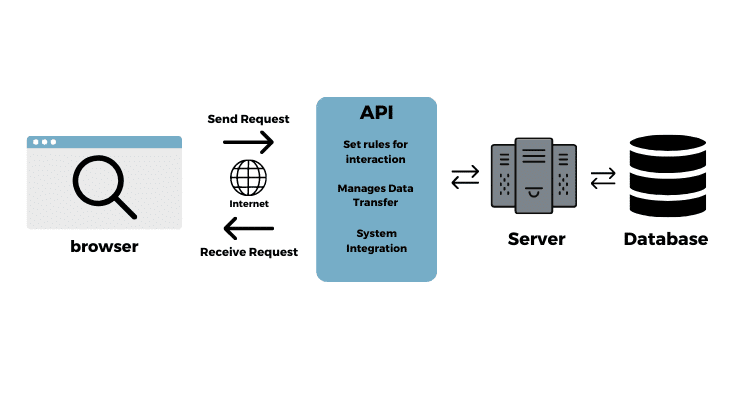
The process for a developer using a pre-existing model on Replicate is incredibly straightforward:
- Find a Model: Browse the Replicate “Explore” page, which hosts thousands of models, from trending LLMs featured in Hugging Face News to specialized scientific models.
- Get Your API Token: Sign up for a Replicate account and retrieve your unique API token from the dashboard.
- Make an API Call: Use your favorite language and an HTTP client, or one of Replicate’s official client libraries (Python, JavaScript, etc.), to call the model’s API endpoint with your desired inputs.
- Receive the Output: Replicate spins up the model on a GPU, runs the prediction, and returns the output, whether it’s text, an image URL, or a JSON object.
This simple workflow democratizes access to models that would otherwise require significant investment in hardware and expertise, rivaling the ease of use of proprietary platforms like OpenAI News or Anthropic News but with the flexibility of open-source. Let’s make our first API call using the Python client to run Meta AI’s Llama 3 8B Instruct model.
Code Example: Running Llama 3 with Python
First, install the official Replicate Python library and set your API token as an environment variable.
pip install replicate
export REPLICATE_API_TOKEN="your_api_token_here"
Now, you can run a prediction with just a few lines of Python. We will ask the model to write a short poem about the challenges of debugging code.
import replicate

# The model identifier for Meta's Llama 3 8B Instruct
model_id = "meta/meta-llama-3-8b-instruct"

# Define the input for the model
prompt_input = {
    "prompt": "Write a four-line poem about the frustration of a missing semicolon in code.",
    "temperature": 0.6,
    "max_new_tokens": 100
}

# Run the model and collect the output
output_generator = replicate.run(model_id, input=prompt_input)

print("Llama 3's Poem:")
for item in output_generator:
    print(item, end="")

print("\n")
This synchronous call waits for the model to complete and then streams the output tokens to your console. It’s a perfect starting point for simple scripts and testing, showcasing how quickly you can go from an idea to a result. This ease of integration is a key theme in recent Replicate News and a major reason for its adoption.
Section 2: Asynchronous Workflows for Production Applications
While the synchronous `replicate.run()` method is great for quick tests, it’s not ideal for production web applications. Many state-of-the-art models, especially in image or video generation, can take several seconds or even minutes to run. A user’s web request would time out long before the process completes. The solution is to use asynchronous predictions and webhooks.

The Asynchronous Prediction Lifecycle
The asynchronous pattern involves two main steps:
- Start the Prediction: You send a request to Replicate to start a job. Replicate immediately responds with a prediction ID and a status (e.g., “starting”). Your application can store this ID and inform the user that their job is processing.
- Get the Result: You have two options to get the result. You can either periodically poll Replicate’s API using the prediction ID to check the status, or you can provide a webhook URL. When the prediction is complete, Replicate will send a POST request to your webhook with the final output. The webhook approach is far more efficient and is the recommended best practice for production systems.
This pattern is essential for building robust applications and is a common feature across major cloud platforms like AWS SageMaker and Google’s Vertex AI. It ensures a non-blocking, responsive user experience.
Code Example: Asynchronous Image Generation with Webhooks
Let’s create an asynchronous job to generate an image using Stability AI’s SDXL model. We’ll need a publicly accessible endpoint to receive the webhook. For local development, a tool like ngrok is perfect for this. For a production app, you would use a route in your web framework like FastAPI or Flask.
import replicate
import time
import os

# Ensure your API token is set
# export REPLICATE_API_TOKEN="your_api_token_here"

# A publicly accessible URL to receive the webhook notification.
# Use a tool like ngrok for local testing: `ngrok http 8000`
WEBHOOK_URL = "https://your-webhook-receiver.com/replicate-callback"

# The model identifier for Stability AI's SDXL
model_id = "stability-ai/sdxl:39ed52f2a78e934b3ba6e2a89f5b1c712de7dfea535525255b1aa35c5565e08b"

try:
    # Start the prediction
    prediction = replicate.predictions.create(
        version=model_id.split(":")[1],  # The model version hash
        input={
            "prompt": "An astronaut riding a horse on Mars, photorealistic, 4k",
            "width": 1024,
            "height": 1024,
        },
        webhook=WEBHOOK_URL,
        webhook_events_filter=["completed"] # Only notify on completion
    )

    print(f"Prediction started with ID: {prediction.id}")
    print(f"Status: {prediction.status}")
    print("Replicate will send a POST request to your webhook when complete.")
    print(f"Check status manually at: {prediction.urls.get('get')}")

except Exception as e:
    print(f"An error occurred: {e}")

# In your web application, you would have a route to handle the webhook:
#
# from flask import Flask, request, jsonify
#
# app = Flask(__name__)
#
# @app.route('/replicate-callback', methods=['POST'])
# def replicate_callback():
#     data = request.json
#     print(f"Webhook received for prediction {data['id']}.")
#     if data['status'] == 'succeeded':
#         print(f"Output image URL: {data['output'][0]}")
#         # Here you would save the URL to your database, notify the user, etc.
#     else:
#         print(f"Prediction failed or was canceled. Status: {data['status']}")
#         print(f"Error details: {data.get('error')}")
#     return jsonify({"status": "ok"}), 200
#
# if __name__ == '__main__':
#     app.run(port=8000)
This asynchronous approach is fundamental for building scalable AI applications. It decouples the long-running AI task from your main application thread, a pattern also seen in distributed computing frameworks like Ray and Dask.
Section 3: Deploying Your Own Models with Cog
While using existing models is powerful, the ultimate flexibility comes from deploying your own fine-tuned or custom-built models. This is where Cog shines. Cog packages your model into a standard format that Replicate understands, handling all the Docker and dependency complexities for you. This is a significant advantage over manually configuring environments on platforms like Azure Machine Learning or using more complex container orchestration.
The Cog Configuration
To make a model “Cog-compatible,” you need two key files:
cog.yaml: A configuration file that defines the Python version, system dependencies (like CUDA), and Python packages required to run your model. It also specifies the hardware (GPU type) needed.predict.py: A Python script containing a `Predictor` class. This class must have a `setup()` method to load your model into memory and a `predict()` method that takes inputs and returns the model’s output.
This standardized structure allows Replicate to build, optimize, and serve your model efficiently. It’s a key piece of technology that fuels the entire platform, making it a powerful alternative to other model serving solutions like Modal or RunPod.
Code Example: Packaging a Simple Sentence Transformer Model
Let’s package a simple sentence embedding model from the Sentence Transformers library. This model can convert sentences into dense vector embeddings, a common task in semantic search and RAG systems that use vector databases like Pinecone, Milvus, or Chroma.
First, create the `cog.yaml` file:

# cog.yaml
build:
  python_version: "3.10"
  python_packages:
    - "torch==2.1.0"
    - "sentence-transformers==2.2.2"

# Specify the GPU hardware required
predict: "predict.py:Predictor"
gpu: true
Next, create the `predict.py` file:
# predict.py
from cog import BasePredictor, Input, Path
from sentence_transformers import SentenceTransformer

class Predictor(BasePredictor):
    def setup(self):
        """Loads the model into memory to make running multiple predictions efficient."""
        self.model = SentenceTransformer("all-MiniLM-L6-v2")

    def predict(
        self,
        text: str = Input(description="Text to generate an embedding for.")
    ) -> list:
        """Runs a single prediction on the model."""
        embedding = self.model.encode(text)
        # Convert numpy array to a list for JSON serialization
        return embedding.tolist()
With these two files in a directory, you can test it locally using Cog (`cog predict -i text=”Hello, world!”`) and then push it to Replicate with a single command: `cog push r8.im/your-username/my-embedding-model`. Replicate will build the image and provide you with an API, ready to be integrated into your applications. This streamlined workflow is a game-changer for developers and a core topic in recent MLflow News and discussions around MLOps best practices.
Section 4: Best Practices and Production Optimization
Moving from experimentation to a production environment requires careful consideration of costs, security, and performance. Here are some best practices for using Replicate effectively.
Cost Management and Hardware Selection
Replicate bills by the second for the time a GPU is active running your prediction. This pay-as-you-go model is cost-effective for bursty or infrequent workloads. However, for high-throughput applications, costs can add up. Monitor your usage in the Replicate dashboard. When deploying your own model, choose the smallest GPU that can effectively run it to minimize costs. A simple embedding model doesn’t need an A100. This is a key consideration when comparing against services like Amazon Bedrock News or Azure AI News, which offer different pricing models like provisioned throughput.
API Key Security and Webhook Validation
Never expose your `REPLICATE_API_TOKEN` in client-side code or commit it to public repositories. Use environment variables or a secure secret management system. When using webhooks, ensure your endpoint is secure. Replicate signs its webhook requests with a secret key, allowing you to verify that the incoming request is genuinely from Replicate and not a malicious actor.
Model Versioning and Cold Starts
Models on Replicate are versioned using their content hash. Always pin your application to a specific model version (e.g., `meta/meta-llama-3-8b-instruct:80d9BC…`). This prevents your application from breaking if the model author pushes a new, incompatible version. Be aware of “cold starts”: if a model hasn’t been run recently, Replicate may need a few seconds to load it onto a GPU. For applications requiring low latency, consider using dedicated deployments (an enterprise feature) or pre-warming the model with periodic requests during low-traffic periods.
Integration with the AI Ecosystem
Replicate is not an island; it’s a powerful component in a larger AI stack. It integrates seamlessly with popular frameworks like LangChain and LlamaIndex, which can use Replicate as a provider for LLMs or embedding models. For monitoring and observability, you can use tools like LangSmith or log Replicate API calls and performance metrics to platforms like Weights & Biases or Comet ML to get a full picture of your application’s behavior.
Conclusion: The Future of AI Development is Simple
The constant stream of NVIDIA AI News and breakthroughs from labs worldwide is exciting, but it also creates a significant implementation gap for developers. Platforms like Replicate are essential for bridging this gap, transforming complex, state-of-the-art models into simple, reliable, and scalable APIs. By abstracting away the underlying infrastructure, Replicate empowers developers to focus on what truly matters: building innovative applications that leverage the incredible power of modern AI.
We’ve covered how to run predictions synchronously and asynchronously, how to package and deploy your own custom models with Cog, and the best practices for moving to production. Whether you’re building a chatbot, a creative tool, or a data analysis pipeline, Replicate provides the speed and simplicity needed to stay on the cutting edge. The next step is to explore the vast library of models on the platform, grab your API key, and start building. The future of AI is accessible, and it’s just an API call away.


